Showing posts with label dessert. Show all posts

Sunday, August 14, 2011

Mini Key Lime Pies in Canning Jars

I'm working on making some changes in our diet for the better.  But, gosh, I'm getting a sweet tooth.  This is adapted from savour-fare.com, August 5.  I've been looking forward to it all week.  Can't wait

I'm interested in the increased number of puddin' recipes I'm seeing.  Oh, they call them tarts and flans and pot d'cremes, but they are really puddin' and custard.  I think we are living in a world that strongly desires to go back to simpler times, but just doesn't know how. 

Mini Key Lime Pies in Canning Jars

The Crust
6 low fat graham crackers, crushed
1 T. sugar
2 T. butter, melted.

Combine and spoon into the bottom of 6 - 1/2 pint canning jars.  Yes, you can, and should, bake in canning jars.  Bake at 350 for 7 - 9 minutes.  It doesn't get a firm crust, just dries up and makes a crumb.  Cool it to room temp.


The Puddin' 
1/2 c. Half and Half (What can I say?  We used the last of the milk in our breakfast.)

1 package of plain dry gelatin

Combine and whisk until smooth.  It will be a little lumpy at first, but take your time. 


Reserve 1 T. of this and gently heat the rest on the stovetop until it starts to thicken.  Try to incorporate any lumps. Set it aside to cool a bit.


In the reserved 1 T. Milk and gelatin, add 2 egg yolks, and 3 T. Sugar. 


To the cooked mixture on the stove, gradually add in 1/2 c. good quality organic plain yogurt.  Add also the egg yolk mixture.


and 1/2 c. key lime juice (Just to be clear, Key Limes don't grow where I live).


and 1 t. Triple Sec.  Yeah,  I'll be good tomorrow, really, I will.

And into the frig she goes to get good and cold. 


Divide the lime puddin' between the prepared jars.

Looks like there's enough room for the remaining 2 eggs whites whipped with 2 T. sugar and another capful of the triple sec.  (You could whip cream if the uncooked egg whites turn you off.)


Divide the topping between the jars.  


Savour Fare suggests adding canning lids and packing it in a picnic.  Okay, if your taking a good cold ice box.  I wouldn't want this at room temp for long.  Just saying.


Yeah, I think I know where the other half jar of key lime juice will be going.  'Cause this puddin' is good stuff. 

And I'll be visiting Savour Fare to see what else she's doing.

Printable:  https://docs.google.com/document/d/1QhPPsMQxNz0i_SrsvZDHUjtyHWgiqgKbbfUNw-Ofn88/edit?hl=en_US#
 

Sunday, May 22, 2011

Gingered Rhubarb Apple Crisp

2C. Diced Rhubarb
3 large apples, peeled and sliced
1 c. sugar
1 T. minced candied ginger
1 t. flour


Combine ingredients and set aside.  In a small bowl, combine the following.
1/2 c. flour
1/2 c. brown sugar
1/2 oatmeal
2T. melted butter.


Turn rhubarb mixture into a sprayed 9 " square pan.  Spread topping over.  Bake in a preheated 350 degree oven for 45 - 50 minutes.

I've been eating rhubarb all of my life.  The addition of ginger is new to me.  This is a unique and delicious.  The tart of the rhubarb, sweet from apple, and spiciness of ginger.  If there happens to be a little cream or ice cream around, that wouldn't be too bad either.

Monday, January 3, 2011

Cali, the Cat and Humble Baked Custard

Cali the Cat
I'm kind of obsessed with the cat right now.  You'll remember that this is not my cat.  It belongs to Step Son and Daughter in Law, who are staying with us temporarily.  Of course, this is not my first acquaintance with Cali.  We've known her for years. 

But now everywhere I go in my house, there is this freaking cat.  She may not look like a special cat in these pictures, but yesterday, I poked her with my big toe to see what would happen and she did a back flip.  Are all cats this entertaining? 

I might mention that I've never had a cat in all of my 51 years.  I'm a dog person.  My father didn't like cats.  They disturbed his landscaping, if you know what I mean.  He liked his yard.  If you don't know what cats do in bark dust, well...
     

 If I hand you the duster, could you get the high spots for me?

Why do I have the creepy feeling that she might jump down on me?


Dude, don't touch my new chair or we are going to have a problem.


And
Humble Baked Custard
4 eggs from Willamette Farms Eggs
2 c. Milk from Alpenrose
1/2 c. sugar
1 t. vanilla
1/4 t. salt.
Homemade Blackberry Jam
Preheat oven to 325 degrees.  Combine all ingredients in a bowl with a whisk.  Divide between several custard dishes or small ramekins. 
Add a dollop of your favorite preserve to eah.  I'm using homemade blackberry jam right now.  Stir it around a couple swishes, just enough to spread it around a bit.   

Place the dishes into one larger flat pan, a roaster, large cake pan or the like. Place in the oven and pour water into the larger pan being careful to not get water in the custard.


 Bake for 30 to 40 minutes or until a knife inserted comes out clean.  


A humble dessert.  A snack for the kids.  Just a nice, old fashioned thing that makes me happy.  


Linked with
The Nourishing Gourmet http://www.thenourishinggourmet.com/2011/01/pennywise-platter-thursday-1611.html


and Culinary Bliss
http://culinarybliss.blogspot.com/


Saturday, October 16, 2010

My Mom's Raw Apple & Nut Cake

Does anyone reading this have a suggestion?  I just love this recipe in the fall, but it is an old recipe.  Something, my mom made, and it calls for shortening.  Can I substitute another oil and get the same result?

It comes out with a crunchy top but so soft and nice inside.  I suspect you would loose some of the texture with another oil. 


Mom's Raw Apple & Nut Cake
Cream 1/2 c. shortening, 2 c. sugar.  Beat well:  2 eggs; then add to creamed mixture with 1 t. vanilla. 

Sift together and add to creamed mixture:  2 c. flour, 2 t. soda, 1 t. cinnamon, 1 t. nutmeg.  Then add 4 c. raw apples, peeled and diced fine, 1/2 c. nuts and 3/4 c. raisins (optional).

This is a very stiff dough.  Bake at 350 for 45 minutes.

My 8 x 13 Pyrex sprayed with cooking spray is what I've always used.


Remember to get your apple a day!


Sunday, May 9, 2010

Old Fashioned Vanilla Ice Cream (4 qt.)

Homemade ice cream was made regularly during the summer when I was growing up.  Mom made the mixture; Dad manned the freezer.  During those years they had a hand crank freezer.  Let's just say there is a little bit of work involved in making ice cream this way.  

My daddy was not a big guy, but he was a serious dude.  When he did something, a lot of energy went into it.   But as it began to get harder, it would be more difficult to turn the crank.  I remember my daddy bent over the freezer on the covered patio just turning away.  When it got too difficult, he would ask one of the children to sit on top of the freezer.  Mom would bring towels or a pile of newspapers to put on top of it.  Then the child would sit on that.  You knew you were a big kid when you were allowed this honor.  
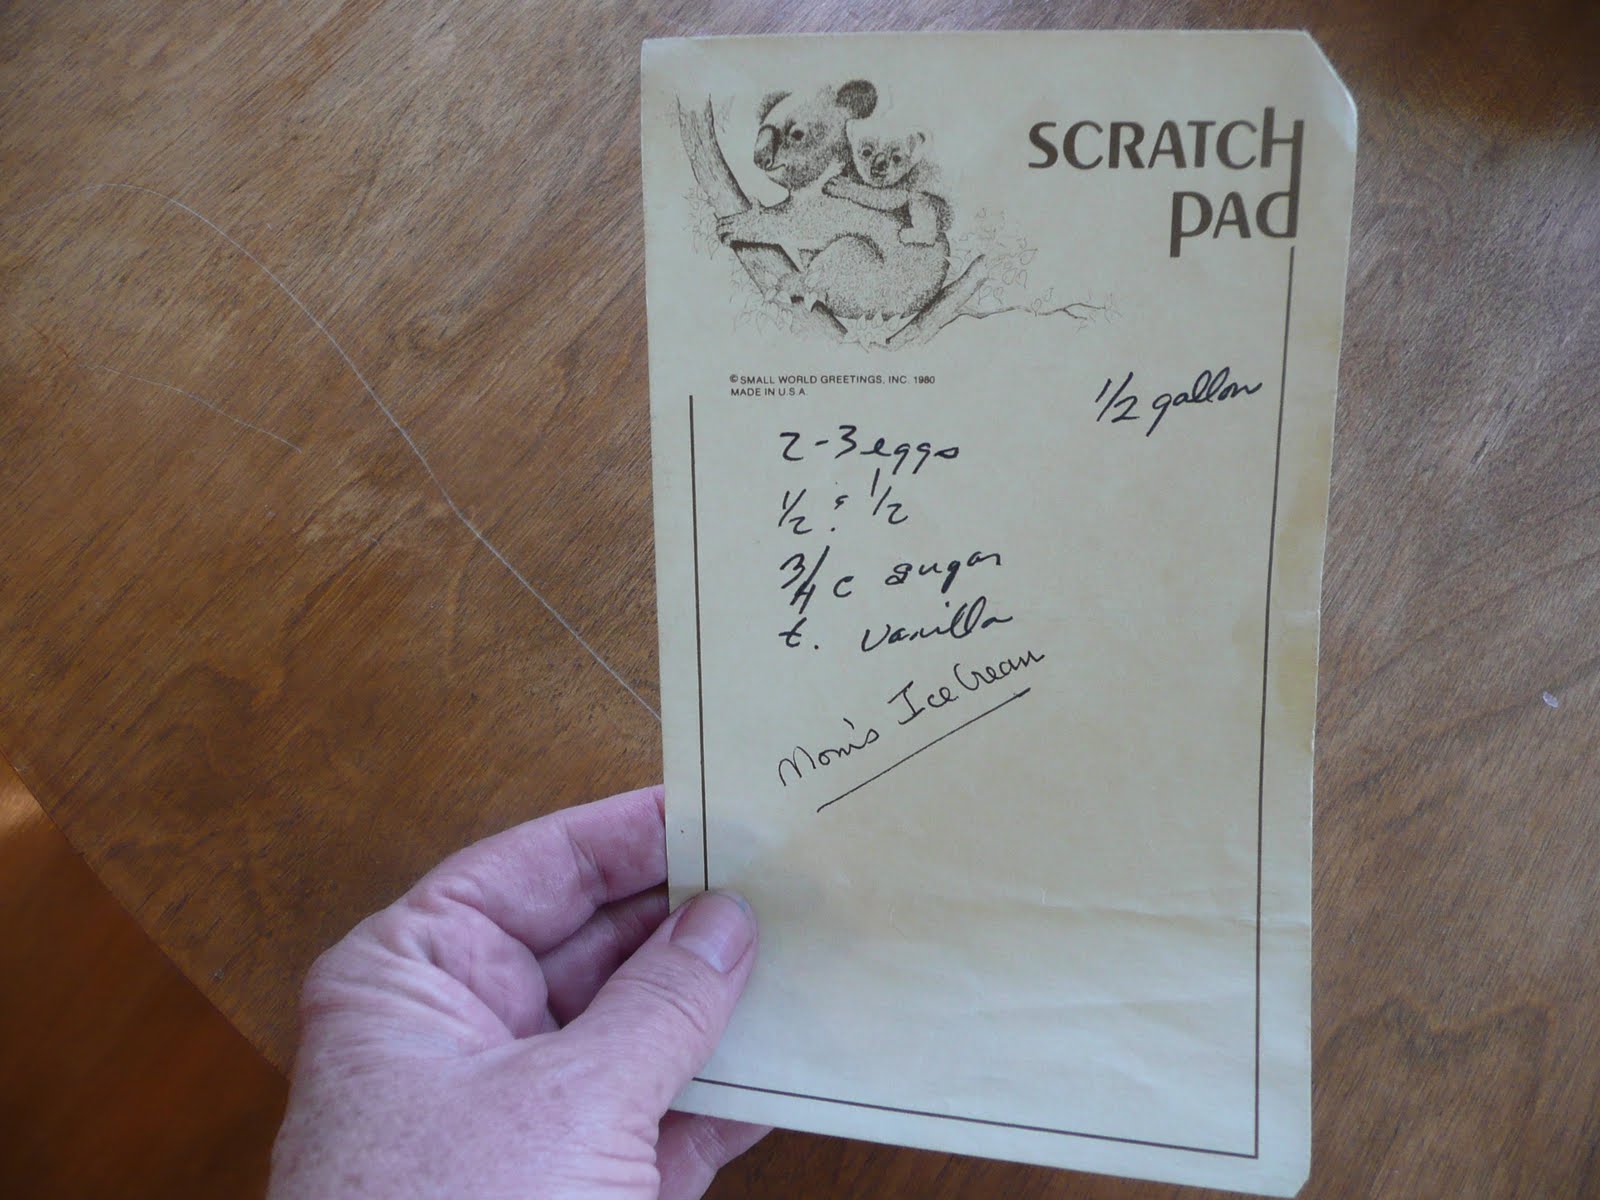
I have my mother's old recipe.  I remember asking her for it during a conversation in the car and her rattling it off while I jotted it down.  But I make a better ice cream.(I say that only because I know she won't be seeing this, but it is true.)  Sorry Momma.

Osborne Backyard Vanilla Ice Cream
2 1/2 c. sugar
1/4 c. + 2 T. flour
1/2 t. salt
5 c. milk (2 % or whole)
4 eggs, beaten
4 c. cream or 1/2 and 1/2
2 T. vanilla

Combine flour, sugar and salt in a large pan.  Gradually stir in the milk, careful to whisk out any lumps.  Cook over medium heat approximately 15 minutes or until thickened, stirring constantly. 

Gradually, temper the eggs by slowly adding 1 cup of the hot mixture into the ends.  Slowly add the egg mixture back into the pan while whisking.  If you just dump it in, you'll have little bits of scrambled egg in your ice cream.


Take your time.  Then slowly pour it back into the pan.


Cook 1 minute.  Remove from heat.  Add cream or 1/2 & 1/2 and vanilla. 

Stick in the frig until it is fully chilled.  The colder it is when you put it in the freezer, the faster it will make

Freeze in an ice cream freezer per manufacturers directions.


I sometimes add some instant coffee and chocolate sauce to this recipe for a treat that is just over the top good.

More info coming, check back. 

Saturday, April 3, 2010

Bunny Cake

When I was younger, I dated a fella, named Steve.  Unfortunately, he wasn't that nice of a guy, because his parents were awesome.  They were this big stereotypical Italian family.  And in fact, Steve was 1/2 Italian.  Both of his dad's parents were born in Italy.  They weren't still alive, but I enjoyed the stories and the warmth mixed with a little danger of the Dad.  I learned plenty from him.  But it was his mother!  Not Italian, but more of the stereotypical big warmth than any of them.  This cake is something she did around Easter.  Not the recipes, the decorations that shape it into a bunny.

Here's the old fashioned way to prepare a cake pan, (instead of spray.)  Dip your fingers into the solid shortening and get some.  Spread it with your fingers over the pan bottoms and sides until it is spread evenly and thoroughly covers.  Get addtional shortening in your hands and continue with both pans.  I recommend trying to enjoy this.  Kids love this kind of this for good reason; it's fun. 

Now spoon a little all purpose flour into each pan.  Hold the pan upright, shaking it and tapping it with my right palm.  Rotate the pan moving the loose flour until there is some flour stuck to all surfaces.  If any loose flour remains in the pan, pour it into the next and continue with the same procedure in the next pan.  When the final pan is coated, dump any remaining flour into the sink with the garbage disposal.
I'm not going to share this recipe because it is not original.  It is the basic yellow cake out of this late '70s Better Homes cook book.  If you want this recipe, e-mail me.

But, before you start cooking are your sink's clean.  If not, take the time to empty and clean your sinks.  Put away any clean dishes.  Get anything dirty shoved into the dishwasher.  On one side, start a sink of hot soapy water to receive any dirty dishes as they get created.  
Dry ingredients in one bowl, cream the butter in another.  The slowly start adding the wet ingredients to the dry while mixing.  I've never had a standing mixer.  My old Black and Decker hand mixer has always done what I need.  But if you have one of those nice Kitchenaide standing mixers, here is the time to drag it out. 

Stop from time to time and use a spatula to scrap the sides of the bowl.  It is just me, or does the combination of butter, vanilla and sugar have an intoxiating affect?  Maybe it just reminds me of good things. Take the time to taste.  I'm not embarrased to stand at the sink licking the bowl and you shouldn't either.  Pour the dough evenly into the two prepared pans and place in a preheated oven to bake. 

You test a cake for done with a toothpick stuck in the center.  It should come out clean.  Also the edges start to pull away from the pan.  Let them cool on a cooling rack so air can get all around them.  This will make two cakes. 

My pans are the old fashioned kind with the little thing that you run arround to loosen the bottom, but I prepared them well.  They had pulled away and popped right out.  Had to have husband help take the two handed photo.
I lined the bottom of my cake carrier with parchment, cut the cake in half and set the bottoms together cut sides down.  I cut out a little notch.  The cut out portion will be the tail.  The head is the piece on the cake to the far right on the photo will be the head.  Well, there is going to be some icing before we are done.  The picture below shows the tail in place.  There will be two rabbit cakes.


I made the butter icing recipe from the same cookbook and iced the cake.  I patted shredded coconut all over it.  


Black licorice cut up and stuck on for whiskers.  Belly Jellies for eyeballs.  The ears of index cards cut and colored, then stuck on. 

I wanted the tail pink, so I colored some of the coconut pink.  The grass is coconut colored green.  Food coloring of course.  There are jelly beans in the grass and peeps all around.  This is one.  Another to make and store until tomorrow.  Husband seems amused and entertained.  He knows his wife and is staying out of the way. 
Remember to play.


Sunday, January 24, 2010

Husband's Pie

My husband is a carnivore, a mountain man, a lone wolf.  He does not have a sweet tooth and rarely eats dessert.  Oh, he'll eat ice cream, but that's about it.  This presents a problem.  One of favorite all time things, well besides King Crab, artichokes in butter, steamed clams, Josh's barbecued ribs, shrimp prepared any way, is pie.  To be more precise, pie crust.  I absolutely love the stuff.  It makes me dream of lovely afternoons helping my grandmother make mincemeat and peeling apples for my mom.  It makes me warm and comfortable.  I can smell it now as I write this.  I love pie crust and I make a pretty good one.  I blogged about it for days already, see November 6 "All for the love of pie crust, installment 1" and November 8 "All for the love of pie crust, installment 2" for the recipe and the Zen of Pie.


I suppose it's for the best, that Husband does eat much pie.  We'd both be as big as a house.  But there is one pie that he asks for.  A very simple thing.  Not really even a recipe.  This is Husband's pie (Or Lemon Meringue).

It starts with a baked pie crust.  See my previous pie posts for the recipe.  Just the bottom crust for this one.  Crimp it and poke holes with a knife in the bottom. 

I love kitchen gadgets, but there are many which are unnecessary in my opinion.  Do what you like.  There are weights you can buy to put in the buttom of the pie crust while baking. The fear is the very high heat that this cooks at will cause the bottom to puff up.  I've been doing this all my life and never really had a problem. 

Bake the pie crust at 450 degrees for 10 minutes or until golden.  Allow to cool. 

And here is my favorite helper.  She is the perfect child and the subject of my December 5 post.  I hope she will think of me as she cooks after I am gone.  She has the same desire to taste and touch.  She is curious and courageous.  Today, she has a new card game.  Unlike me, she doesn't really care what the instructions say and she is teaching me the game by her rules.


Next, the filling.  One 4.3 oz box of Jello cook & serve lemon pudding.  Yes, I know.  I never cook with powder and I never cook with something if I don't understand the ingredient list, but this is an exception.  My helper wants a taste, a little goes on her plate.  "Yum," she says.  The rest, well after the spoonfuls I eat, go into the prepared pie crust.  It's a wonder I'm not huge. 

Now meringue.  A touchy subject for some.  For me also, until I decided it didn't have to be perfect.  For years, I've said about pie crust, "A messy pie crust is better than no pie crust."  As it is with meringue. 

Beat 3 egg whites in a large bowl on high speed until foamy.  Gradually add 1/3 c. sugar until stiff peaks form.  I'm not a cream of tartar person.  Someone out there may think I'm wrong about that, but oh well.  Spread meringue over filling with a spatula, sealling the edges.  I always try to make the curly-q in the merinugue on top.  It never turns out the way I want.  Oh well.  Old habits die hard.


Cool the oven to 350 degrees and bake for 15 to 20 minutes or until the meringue is browned.  Cool to just warm or to room temp.

Anything that looks imperfect about this was intended.
  
And remember.  If life throws you lemon, well, make lemon pie.